f you have a blog on your website, then you probably have an RSS feed
which gives you lots of options when it comes to distributing your
content with your audience and beyond. Let’s look at the various ways
you should be using your RSS feed.
What is an RSS Feed
A RSS (Really Simple Syndication) feed is a XML-based format for your
content. Most blogging platforms, for example, will have an RSS feed
built in. Whenever you start publishing posts, your latest posts will
be updated in the RSS feed. Visitors to your website can subscribe to
your blog’s RSS feed in an RSS reader such as
Google Reader.
Ways to Use RSS on Your Blog
First of all, let’s look at the various ways you could (and should) be using your blog’s RSS feed on your blog itself.
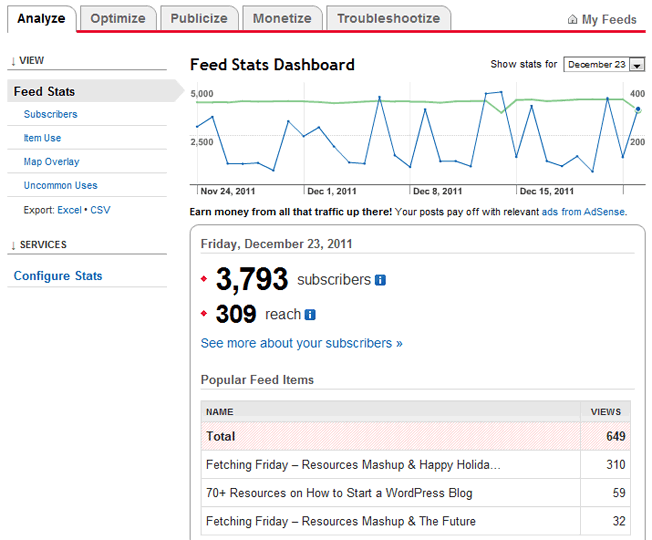
Burn it to FeedBurner
Feedburner
is a service that allows you to track analytics about your RSS feed’s
subscribers and activity. It was once a standalone service, but was
later acquired by Google so you can now set up Feedburner for your RSS
feeds within your Google Account. Once configured, you will get
statistics such as these and more.
To set up your RSS feed with Feedburner, simply copy the URL of your
RSS feed and paste it into the “Burn a feed right this instant” box.

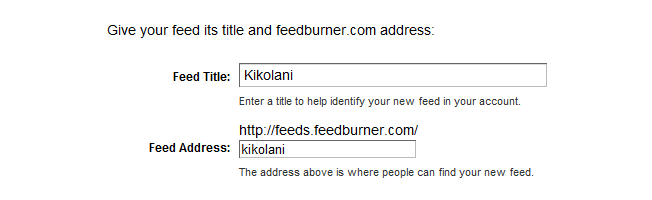
On the next screen, you will enter the Feed Title and address (URL) you would like your feed to have.
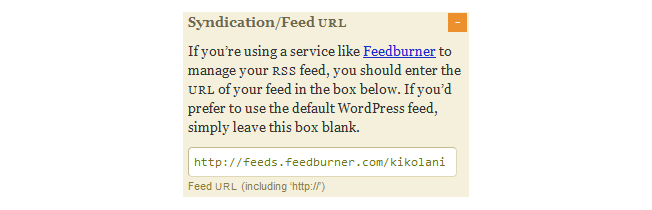
On the next screen you will be given your RSS feed’s new URL on
Feedburner. You will want to use this URL anywhere you reference your
RSS feed on your blog. If your theme has an administration panel, look
for a field where you can enter your Feedburner URL. The following is
how it looks when using the Thesis theme for WordPress.
When you click on Next, you will be given the options to setup tracking features for your RSS feed.
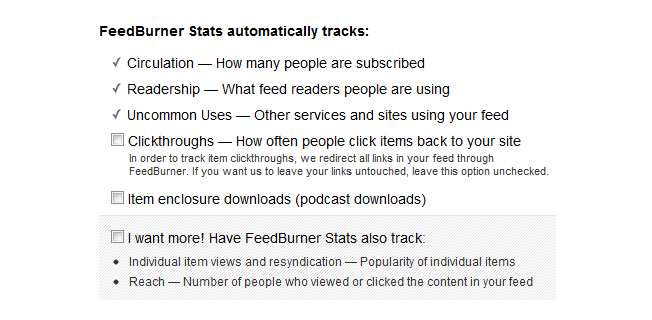
One option is for Feedburner to track clickthroughs. This is
completely up to you and your need to know the clickthrough rate, but I
leave this setting unchecked. Whenever you are tracking clickthroughs,
it will make the URL for your RSS feed items redirect through
http://feedproxy.google.com/~r/FeedName/~3/…
instead of your content’s direct URL. For RSS feed subscribers, that
isn’t such a bad thing. But whenever you use things like CommentLuv
(the benefits of which will be discussed later on in the post), you will
want your URL to be directed to your blog instead of redirected through
Feedproxy. Once you are done setting up stats tracking, click next to
finish set up.
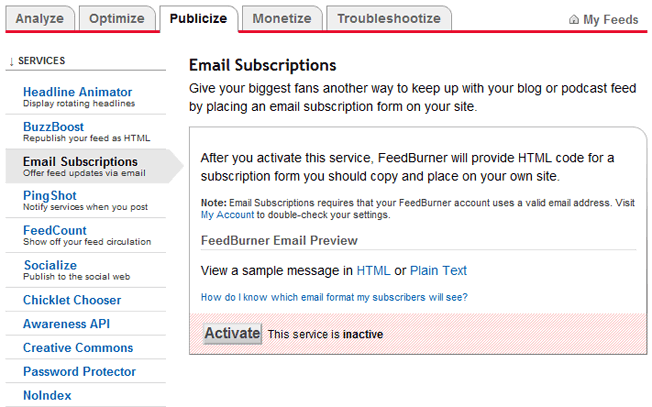
After you have set up your feed, you will want to consider giving
visitors the option to subscribe to your content via email. If so, you
will want to go to the Publicize tab and click on Email Subscriptions.
Click on the Activate button to start email subscription service for
your RSS feed.
You will then want to click on
Communication Preferences in
the left sidebar menu. This will allow you to customize the activation
email subscribers receive to confirm their subscription.
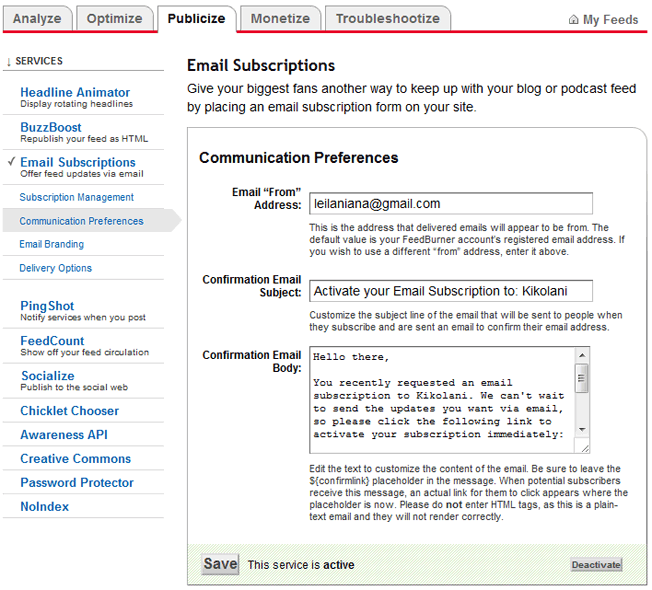
Once customized, click Save. The next options you will want to configure are under
Email Branding
in the left sidebar menu. This is where you can upload a logo,
customize the Email Subject line, and change the font styles, colors,
and sizes to format the email subscribers will receive. Click Save when
finished.
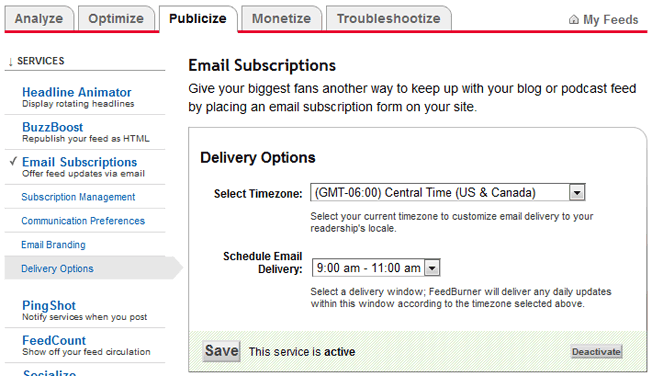
The last (and most important) setting for your email subscription is the
Delivery Options. This is where you will tell Feedburner what time to deliver new RSS feed updates to subscribers.
Once saved, click on the
Email Subscriptions link again.
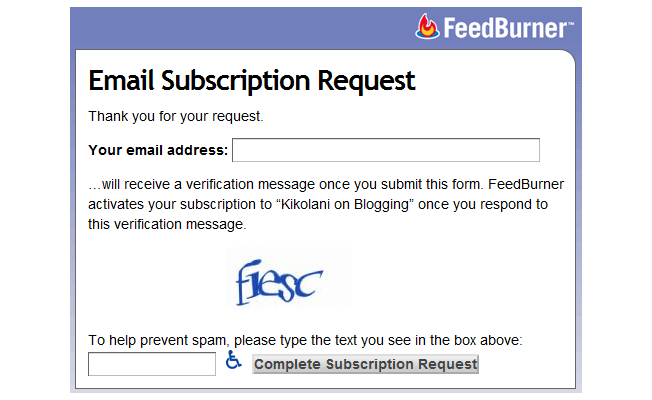
Here, you can get the code to add a subscription form on your blog or
you can get a link to your take visitors to the opt-in form for
subscribing via email.
Now that you have Feedburner setup, let’s look at what you should do with your new subscription option.
Encourage Visitors to Subscribe
Of course, you will want to encourage visitors to subscribe. I
always suggest putting a link to your RSS feed and email subscription
option in several places including the following.
- The Sidebar – The sidebar is a great place to put your subscription
options, including RSS, email, newsletter, Twitter, Facebook, and
Google+. While you might want people to only subscribe via RSS or
email, you should give them a few popular options so they can follow you
in the way they choose.
- At the End of Posts – Once a visitor has read a satisfying post,
they will be more likely to subscribe to you. Be sure that you offer a
link to your RSS feed and other subscription options at the ends of
posts.
- In the Footer – If you’re not comfortable adding subscription
options in the sidebar or after your blog content, at least add it to
the footer. This way, you can direct people to the options you want
them to choose in the sidebar and post footer, but still give those who
want RSS a link at the bottom of the page.
Create Category Feeds
If you have multiple categories on your blog, each of which has a
considerable amount of regular content, consider offering RSS feeds for
them individually. This way, visitors can subscribe to the content they
are most interested in. To find out if you can do this on your blog,
you will want to go to a category page (such as
http://domain.com/blog/category/social-media). If you use Firefox or Chrome’s
RSS Subscription Extension, you should have an RSS icon in your address bar. Click on this to see if the category has an individual feed.
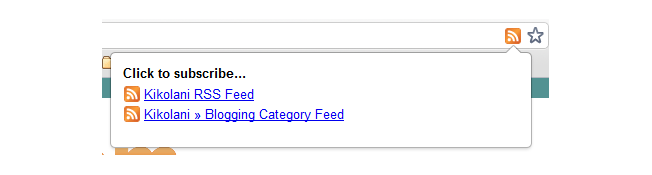
Click on the link to the blog category feed, then burn it to
Feedburner using the steps outlined above. Then offer it on a
subscription options page or at the end of posts within that category.
One site that uses this approach well is
Mashable
because they have so much content in a variety of topics. They offer
RSS feeds, Twitter, and Facebook subscription options for their top
topics.

Other sites that do this include
TechCrunch,
CNN, and
Apple (although mostly for news, knowledge base, and iTunes items).
Subscribe to It
The next most important thing you can do with your RSS feed is
subscribe to it, both in an RSS feed reader and by email. This way, you
will know if there are any issues if the feed doesn’t update in the
reader or you don’t receive an email.
Add Custom RSS Footers
If you’re a WordPress users (self-hosted only), you have the option
of adding an extra line of content to your RSS feed using the
RSS Footer plugin.
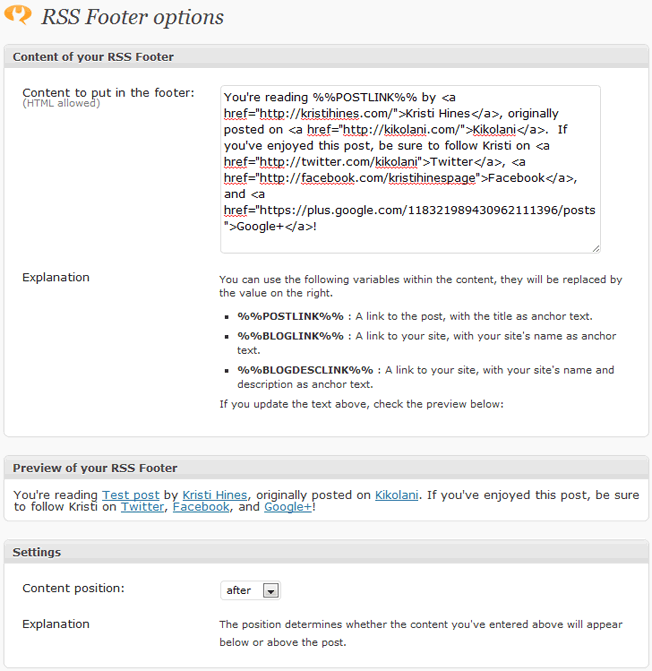
This plugin is great for two reasons. One, you can promote your
social links, main website, or anything else at the end of your RSS feed
content for subscribers. Two, you can make sure that anyone who
auto-steals your content (otherwise known as content scrapers, thieves,
etc.) end up with a link and accreditation to your post no matter where
they use it. What you see in the preview will be added to the end (or
beginning) of your RSS content.
Ways to Use RSS on Social Media
Now that we’ve looked at some crafty ways to use your blog’s RSS feed
on your blog, let’s look at some ways to incorporate it into your
social media.
Send it to Twitter via Twitterfeed
If you don’t want to miss sharing your blog’s latest content on Twitter, you can use a free service like
Twitterfeed.
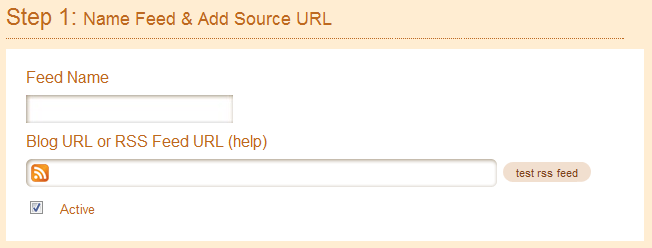
Twitterfeed will update your Twitter account with the latest post from
any RSS feed, including your own. To use it, simply sign up for an
account, and click the
Create New Feed to set up your feed. Start with the Feed Name and RSS Feed URL.
Click on the
Advanced Settings link and be sure to change the following.
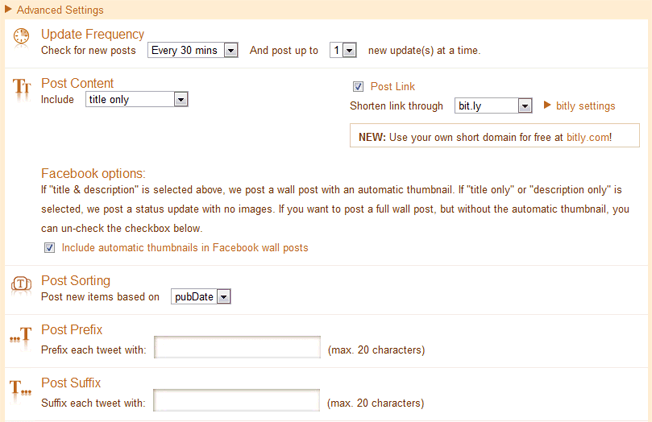
- Post Content – Be sure to use the dropdown for title only. This way
it will just give your post title and shortened URL without the cutoff
first sentence of the post included in the tweet.
- Bitly Settings – If you track analytics using the Bit.ly shortener
and have your own account, click on the bitly settings to enter your API
information so tweets sent through Twitterfeed will be tracked there.
- Facebook Options – Although you can use Twitterfeed to update
Facebook, I would suggest not doing this. Third party updates to
Facebook usually don’t hold as much weight as direct updates to
Facebook.
- Post Prefix & Suffix – Use these to enter something before or
after your tweet. If you are tweeting you company blog, you could enter
RT @companytwitter for the prefix and a common hashtag like #business
(if each blog post is on the same topic) in the suffix.
Click Continue to Step 2 once you are finished with your Advanced
Settings. Select Twitter as the Publishing Service. You will then have
the option to authenticate the Twitter account you want to use to
publish updates to this RSS feed.
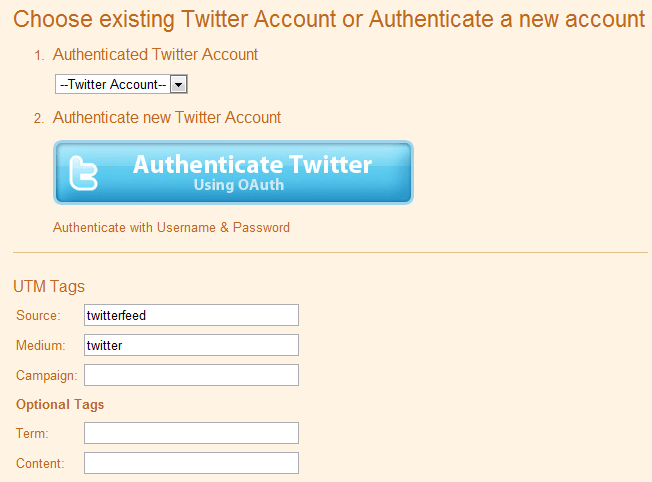
You can also set custom
UTM parameters
so you can track your Twitterfeed related clicks in Google Analytics.
For example, if you are setting up multiple accounts to share your blog
post via Twitterfeed, you could always include the Twitter username as
the medium instead of just Twitter, or make the medium twitter-username.
This way you can see which Twitter accounts drives the most traffic to
your latest content. Click the Create Service button when you’re
finished.
The neat part is that you can use your Twitterfeed dashboard to
determine the popularity of your posts if you use Bit.ly as the URL
shortener. Just click on the feed in your dashboard to see the number
of bit.ly clicks for the latest feed items you have shared.
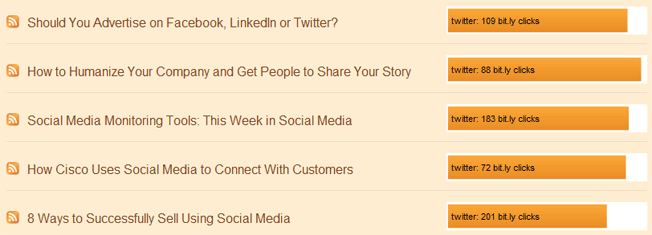
Note that this is not just clicks from the tweets you send via
Twitterfeed, but the total clicks for the bit.ly URL for each feed item.
Feed it to Your Facebook Page Using NetworkedBlogs
I always suggest that you update your Facebook page directly without
the use of any apps, but if you absolutely must use an app, try out
Networked Blogs to update your latest blog content to your Facebook
page. You will first need to sign into Facebook and register your blog
with
Networked Blogs. If you have previously done this, skip the next few steps and go straight to
Syndication.

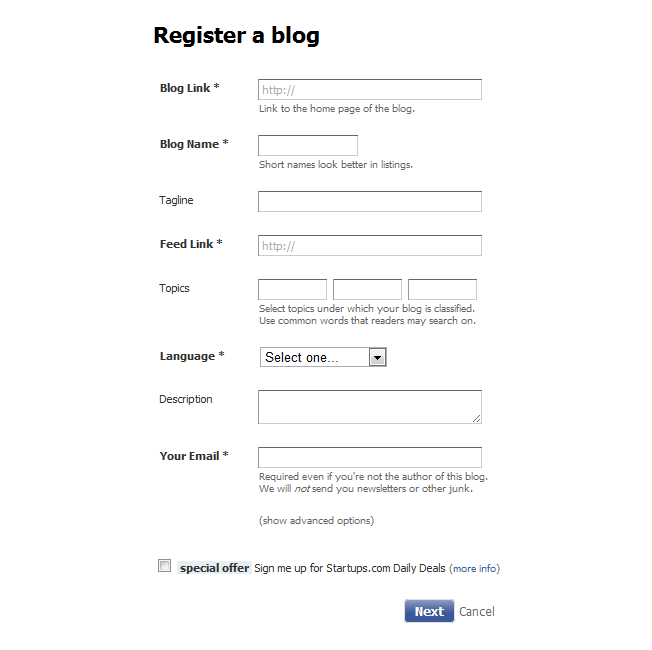
On the next screen, fill in any missing information that isn’t pulled
automatically from your blog, especially the blog link, name, RSS feed
link, language, and your email.
On the next screen, you will be asked if you are the author of the
blog. You will need to either ask your friends to confirm you are the
author or (for a faster process), install a widget to your blog.
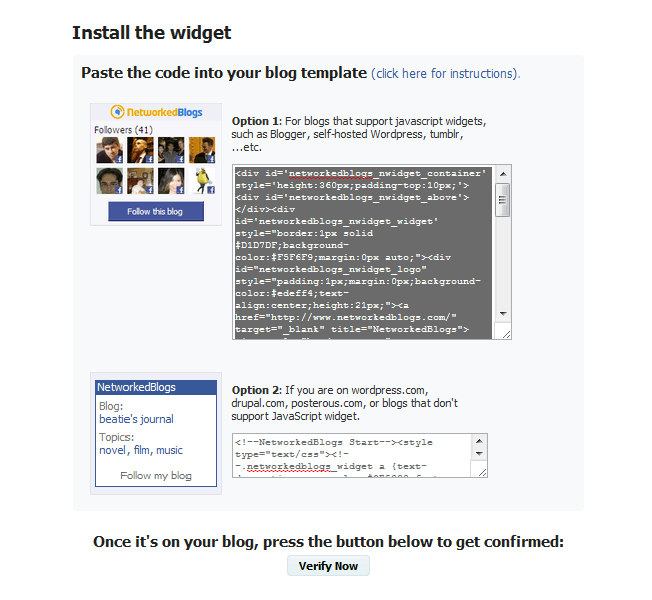
You can add them anywhere on your blog. I prefer using a Text sidebar widget in WordPress for quick addition and removal.
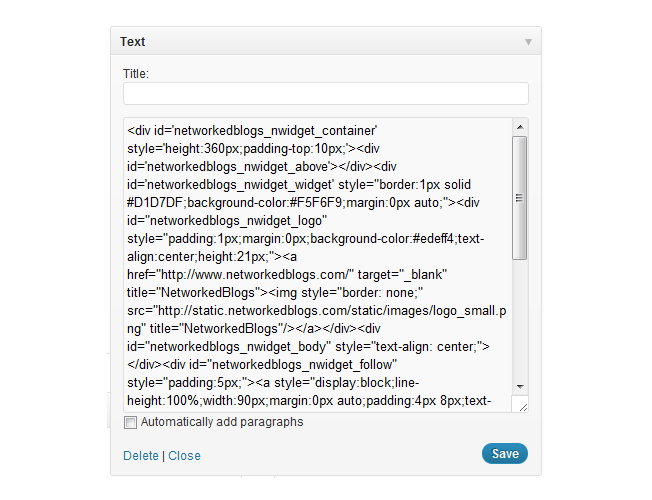
Once installed, click the Verify Now button. Once it is confirmed,
you can remove the widget. This means it is up on your site for maybe
five minutes.
Now that your blog is confirmed, you will see your latest posts and
thumbnail in the Networked Blogs screen. Above your latest post, you
should see a line that says
This blog syndicates to 0 targets. Click the manage link to setup automatic feeds to your Facebook page.
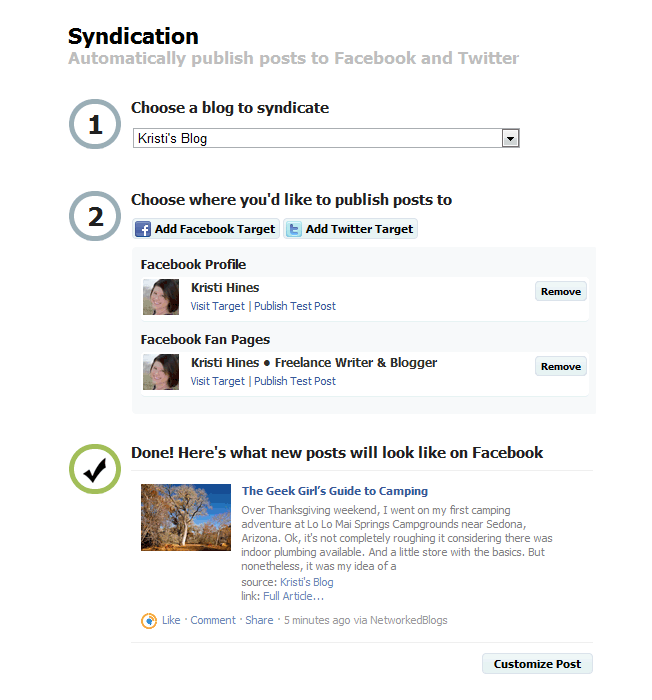
When you click on the Add Facebook Target button, you will get the
chance to select up to 20 pages and your personal profile. You will
also get a preview of what your update will look like using your latest
post. Be sure to click on the Customize Post button for a few more
options.
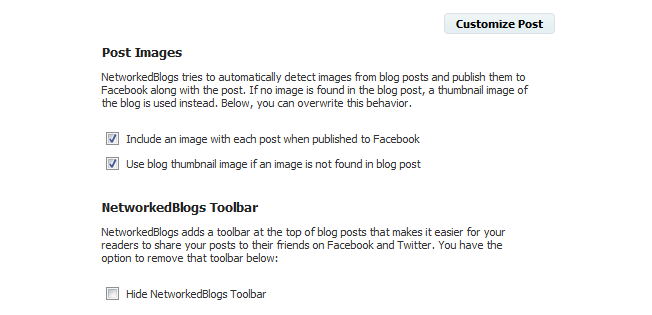
Here you can confirm the image options and also remove the
NetworkedBlogs Toolbar from displaying above your post when a visitor
clicks the update on your Facebook profile or page.
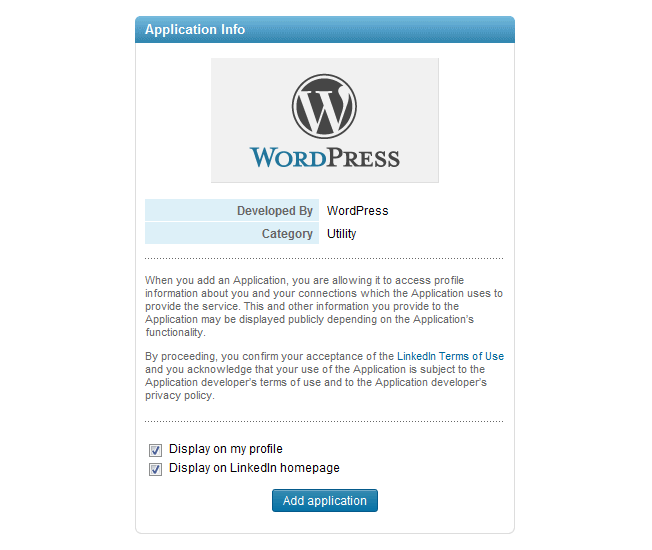
Put it in the WordPress Application on LinkedIn
Want to have fresh content on your LinkedIn profile? Now you can
using the WordPress application. To add this to your LinkedIn profile,
sign in to your LinkedIn profile and go to the
Application Directory. Then scroll down and click on the WordPress application. Click on Add Application to begin.
On the next screen, enter your blog’s URL. You can have it pull any
recent posts or any posts tagged with the keyword LinkedIn.

Click Save to finish, and you will see your latest posts added to your profile.
More Ways to Use RSS Feeds
There are so many ways other ways to use your blog’s RSS feed. The following are just a few more ideas to try out.
Syndicate Your Content
Some sites allow you to add your blog feed to their network, and they
will publish your latest content to their site. Alternatively, they
may moderate your content first to determine if it meets specific
criteria, then publish your content to their site. The advantage of
this is exposing your content to a new and possibly larger audience.
The downside is that people won’t have to go to your site to read it.
My suggestion when it comes to syndicating your content is to make
sure you do it with a network with a larger audience. This way you
benefit by hopefully drawing some of that audience to your own site.
Some sites that allow this include the following sites listed below.
They are all part of the same network. To participate, simply create an
account and add your blog’s RSS feed to your profile. They will
moderate the content and post anything their audience might enjoy.
- Social Media Today
– The world’s best thinkers on social media covering Twitter, strategy,
search, ROI, policy, metrics, marketing, influence, Google+, Facebook,
and more.
- The Engery Collective
– The world’s best thinkers on energy & climate covering wind,
transportation, smartgrid, oil, nuclear, climate, cleantech, and more.
- The Social Customer – The world’s best thinkers on CRM &
customer service covering Twitter, social CRM, reputation management,
Facebook, customer service, and more.
- Sustainable Cities Collective
– The world’s best thinkers on urban future covering transportation,
sustainability, placemaking, health & food, design &
architecture, community planning, bicycling, and more.
- SmartData Collective
– The world’s best thinkers on business intelligence & data
analytics covering warehousing, visualization, marketing automation,
market research, governance, data mining, cloud, analytics, and more.
- Sustainable Business Forum – The future of healthy enterprise
covering workplace safety, environmental stewardship, culture &
leadership, corporate social responsibility, and more.
- HealthWorks Collective
– The world’s best thinkers on healthcare covering social media, public
health, medical technology, medical ethics, policy, business, global
healthcare, and more.
- The Customer Collective – The world’s best thinkers on sales &
marketing covering social selling, sales process, sales, online
community, marketing, lead generation, customer service, CRM, branding,
and more.
- MyVenturePad – The world’s best thinkers on venture funding &
growth covering women entrepreneurs, technology, startups, leadership,
business transformation, and more.
- Governing People – The world’s best thinkers on e-government and open democracy.
CommentLuv Links
If you want to gain more exposure for your blog posts, be sure to
comment on blogs enabled with the CommentLuv plugin. Simply search
Google for
“commentluv enabled” keyword to find blogs in your
niche / industry. Once you find them, you will enter your comment like
usual with your name, email, and URL of your blog. Below the comment’s
Submit button, you will see a drop down that allows you to select from
one or ten of your latest blog posts.
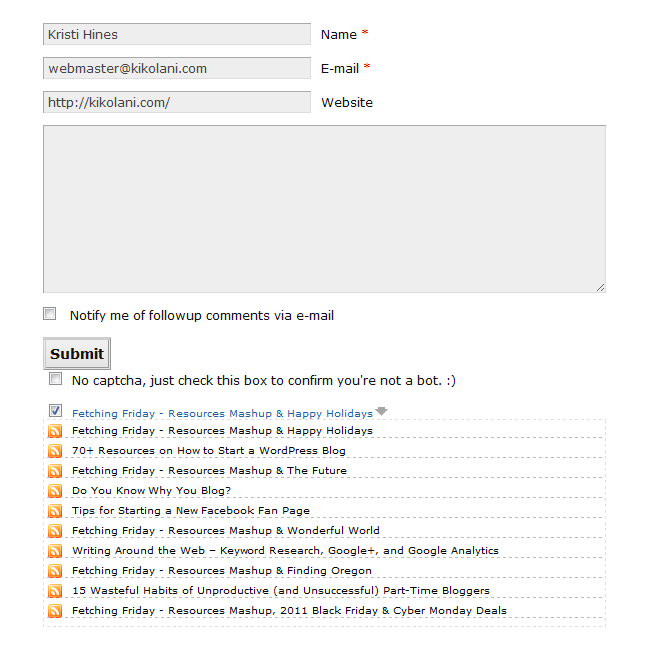
The post that you select will be hyperlinked beneath your comment.
This is a great way to drive traffic to your latest post and, on some blogs, get a dofollow backlink to that post.
Send Your Latest Post via Email with WiseStamp
The
WiseStamp
browser add on that allows you to send a beautifully formatted
signature with your emails on Gmail, Yahoo, AOL, and Hotmail also allows
you to enter your RSS feed to add your latest blog posts to your
signature as well.
You can do it with the RSS app that will add the latest update to any
RSS feed or with the WordPress app (settings shown above) that adds a
more robust snippet of your latest post.


 One
of the most important things for making your readers come back is
frequently updating the contents of your website. Keeping your contents
updated will not only helps a Webmaster to attract the constant flow of
traffic but also brings him up on the search engines. Good content is a
necessity to keep the targeted traffic flow coming on your website.
One
of the most important things for making your readers come back is
frequently updating the contents of your website. Keeping your contents
updated will not only helps a Webmaster to attract the constant flow of
traffic but also brings him up on the search engines. Good content is a
necessity to keep the targeted traffic flow coming on your website.


